


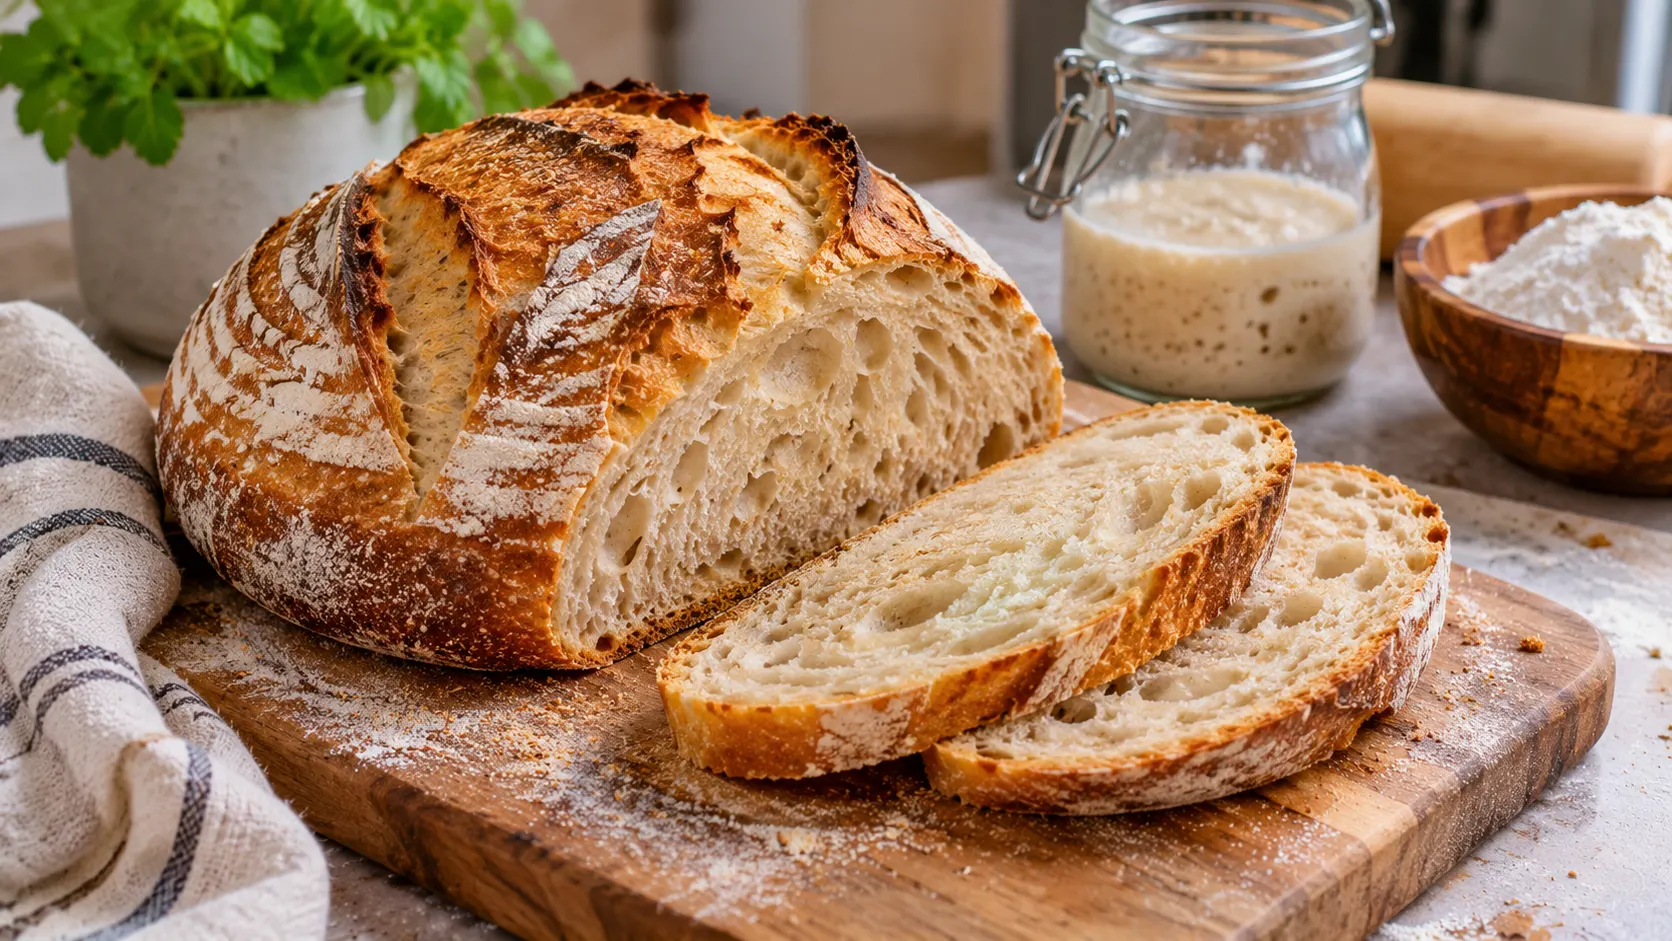
Making homemade sourdough bread is a rewarding way to enjoy a fresh, crusty loaf with a soft center and rich flavor. Unlike bread made with commercial yeast, sourdough uses a naturally fermented starter to help the dough rise. The process takes patience, but you can create delicious bakery-style bread with a few basic ingredients and simple techniques.
A good sourdough bread recipe combines flour, water, salt, and an active sourdough starter. The secret is understanding how fermentation, dough handling, and baking temperature work together. Even beginners can achieve satisfying results by following clear instructions and allowing enough time for the dough to develop.
This guide explains how to make sourdough bread from scratch, including ingredient measurements, mixing, stretching, fermentation, shaping, and baking. You will also discover tips for developing a crispy crust, common mistakes to avoid, and practical advice for storing homemade sourdough bread.
What Is Sourdough Bread?
Sourdough bread is a type of naturally fermented bread made using a mixture of flour and water called a sourdough starter. This starter contains wild yeasts and lactic acid bacteria that help the dough rise. The fermentation process creates distinctive flavors and contributes to the bread’s texture and structure.
Unlike conventional bread recipes that use packaged commercial yeast, traditional sourdough relies on an established starter for leavening. The microorganisms consume available carbohydrates and produce gases and organic acids. These changes help the dough expand while developing the slightly tangy taste commonly associated with sourdough.
Sourdough bread can have a crisp outer crust, tender interior, and pleasantly chewy texture. Its exact appearance depends on the ingredients, fermentation conditions, and baking method. Although the process requires more time than many quick bread recipes, much of that time involves resting rather than active preparation.
Ingredients for the Best Homemade Sourdough Bread
You only need four basic ingredients to make a traditional sourdough loaf. This beginner-friendly recipe uses 500 grams of bread flour, 350 grams of water, 100 grams of active sourdough starter, and 10 grams of fine salt. These quantities produce one medium-to-large loaf with a manageable dough consistency.
Bread flour is a useful choice because its higher protein content supports gluten development and dough structure. Water hydrates the flour and allows fermentation to occur, while salt adds flavor and helps strengthen the dough. The sourdough starter provides the microorganisms responsible for fermentation and rising.
For reliable results, measure ingredients using a digital kitchen scale rather than relying on cups. Different measuring techniques can produce noticeable variations in flour quantity. If your starter is maintained with equal weights of flour and water, these ingredients create a dough with approximately 73% overall hydration.
Equipment You Need to Make Sourdough Bread
Making sourdough bread does not require a professional kitchen or expensive machinery. A large mixing bowl, digital kitchen scale, dough scraper, and clean kitchen towel are useful starting tools. You will also need a suitable container for fermentation and a surface for shaping the dough.
A Dutch oven is particularly helpful for baking a crusty sourdough loaf. Its heavy lid traps moisture released by the dough, creating a steamy environment during the early stages of baking. This helps the bread expand before the outer crust becomes firm.
A proofing basket, also called a banneton, can support the dough during its final rise. However, a bowl lined with a well-floured clean towel works as an alternative. A bread lame or sharp knife can be used for scoring, while a cooling rack allows air to circulate around the finished loaf.
Step 1: Prepare an Active Sourdough Starter
An active sourdough starter is essential for achieving a good rise and developing the bread’s characteristic flavor. A mature starter should show visible bubbles and expand noticeably after feeding. Many healthy starters approximately double in volume near their peak activity, although timing depends on temperature and feeding conditions.
If your starter has been refrigerated, feed it according to your usual maintenance routine before baking. For example, combine 25 grams of mature starter with 50 grams of water and 50 grams of flour. Allow it to ferment in a clean container until it becomes bubbly and reaches or approaches peak expansion.
A starter that rises predictably and smells pleasantly fermented is generally ready for bread making. The float test is sometimes suggested, but it is not a reliable measure of starter strength. If you notice fuzzy mold or unusual pink or orange discoloration, discard the starter rather than using it.
Step 2: Mix the Sourdough Bread Dough
Begin by adding 350 grams of water and 100 grams of active sourdough starter to a large mixing bowl. Stir until the starter is dispersed throughout the water. Add 500 grams of bread flour and 10 grams of fine salt, then mix until no dry flour remains.
The dough will initially appear rough, sticky, and uneven. This is normal because the flour needs time to absorb the water fully. Cover the bowl and allow the mixture to rest for approximately 30 minutes before beginning the next stage of dough development.
This resting period helps the flour hydrate and makes the dough easier to handle. Some bakers use a separate autolyse step before adding starter and salt, but it is not essential for this beginner recipe. Mixing everything together provides a simple approach while still producing excellent homemade sourdough bread.
Step 3: Strengthen the Dough With Stretch and Folds
Stretch and folds help strengthen the gluten network without requiring extensive kneading. After the initial rest, wet your hands lightly and lift one side of the dough. Stretch it upward gently, then fold it toward the center without tearing.
Rotate the bowl and repeat the movement on the remaining sides until you have completed one set. Cover the dough and allow it to rest for approximately 30 minutes. Perform three or four sets during the first two hours of bulk fermentation.
As the gluten develops, the dough should become smoother, more elastic, and better able to hold its shape. Avoid pulling aggressively because excessive force can damage the developing structure. If the dough already feels strong and resistant, allow it to rest rather than performing unnecessary additional folds.
Step 4: Allow the Dough to Bulk Ferment
Bulk fermentation is the stage when the dough develops gas, flavor, and internal structure. After mixing, keep the covered dough in a suitable container at a comfortable room temperature. The stretch-and-fold sessions take place during the beginning of this fermentation period.
At approximately 24–26°C (75–79°F), bulk fermentation may take around four to seven hours from the initial mixing. However, the exact duration depends on starter strength, dough temperature, and flour characteristics. Cooler conditions can considerably extend the process, so use the dough’s appearance rather than the clock alone.
Look for noticeable expansion, bubbles around the container, a slightly domed surface, and a soft, airy texture. An increase of roughly 50–75% in volume can be a useful starting target under moderate conditions. Avoid waiting for the dough to collapse, which may indicate excessive fermentation.
Step 5: Pre-Shape the Sourdough Loaf
Once bulk fermentation is complete, gently transfer the dough onto a clean work surface. Use a dough scraper to release it from the container without unnecessarily pressing out the trapped gas. A light dusting of flour can help prevent sticking.
Bring the edges of the dough toward the center to create a loose round shape. Turn the dough over and gently pull it across the work surface to develop some surface tension. The goal is to organize the dough without squeezing out all the air developed during fermentation.
Allow the pre-shaped dough to rest uncovered for approximately 15–25 minutes. This short bench rest helps the gluten relax before final shaping. If the dough begins spreading slightly, that is not necessarily a problem, provided it still has enough strength for the next step.
Step 6: Shape the Dough for a Beautiful Loaf
Final shaping creates the structure that helps sourdough bread maintain its form during proofing and baking. Lightly flour the top of the rested dough, then carefully turn it over. Fold the edges inward and bring the dough together to form a round loaf.
Turn the loaf seam-side down and gently draw it across the surface to tighten the outer layer. Use controlled movements rather than excessive pressure, which can tear the dough. A well-shaped loaf should feel cohesive and maintain a rounded appearance without becoming overly tight.
Prepare a proofing basket or towel-lined bowl with a light dusting of rice flour or regular flour. Place the shaped dough seam-side up inside the basket. Cover it to prevent drying and prepare for the final proofing stage, which allows additional fermentation before baking.
Step 7: Proof the Sourdough Dough Properly
Proofing allows the shaped dough to continue fermenting before entering the oven. For this recipe, a refrigerated overnight proof is a convenient option that also develops additional flavor. Place the covered proofing basket in the refrigerator at approximately 4°C (39°F).
Allow the dough to proof for around 8–16 hours, depending on fermentation progress and your schedule. Refrigeration slows yeast activity but does not stop fermentation completely. Dough that was already highly fermented before refrigeration may require a shorter cold-proofing period.
Cold dough is usually easier to score and can often be baked directly from the refrigerator. If the loaf appears severely collapsed or has lost its structure, it may have overproofed. The best results come from balancing bulk fermentation with the final refrigerated proof rather than relying on time alone.
Step 8: Preheat the Oven and Dutch Oven
Proper oven temperature is essential for creating a crisp sourdough crust and allowing the dough to expand. Place your oven-safe Dutch oven with its lid inside the oven. Preheat to 230°C (450°F) for approximately 30–45 minutes, or according to your cookware manufacturer’s guidance.
A thoroughly heated baking vessel transfers heat effectively when the dough enters the oven. The enclosed environment also traps steam released during baking. This moisture delays crust formation during the early stages, allowing the loaf to expand more freely.
Always confirm that your Dutch oven, lid, and handles are rated for the intended temperature. Some cookware components have lower heat limits than the pot itself. Use dry, heat-resistant oven mitts when handling hot equipment, and take special care when removing the lid because steam can escape rapidly.
Step 9: Score the Dough Before Baking
Scoring involves making a controlled cut across the surface of the dough before baking. The cut creates a planned area for expansion as gases and steam push outward in the oven. It also gives homemade sourdough bread its recognizable artisan appearance.
Remove the dough from the refrigerator and gently turn it onto a suitable piece of heat-rated baking parchment, if using. With an appropriate scoring tool, make one confident cut approximately 1 centimeter deep. Keep your fingers away from the blade and avoid trying complicated patterns as a beginner.
A simple curved or diagonal score is enough to help the loaf expand. Decorative patterns are optional and do not determine the bread’s overall quality. If the dough spreads slightly after turning it out, work efficiently so it retains as much structure as possible before baking.
Step 10: Bake the Sourdough Bread Until Golden
Carefully transfer the scored dough into the preheated Dutch oven, using parchment as a lifting aid only if it is rated for the baking temperature. Replace the lid and bake at 230°C (450°F) for approximately 20 minutes. The enclosed environment encourages oven spring and helps the crust develop.
After the first 20 minutes, carefully remove the lid while avoiding escaping steam. Continue baking for approximately 20–25 minutes, until the crust becomes deeply golden brown. Oven performance varies, so monitor the loaf rather than relying on cooking time alone.
A fully baked sourdough loaf often reaches an internal temperature around 96–99°C (205–210°F), although temperature is only one indicator. The finished bread should have a well-developed crust and feel relatively light for its size. Transfer it to a cooling rack immediately after baking.
Step 11: Cool the Bread Before Slicing
Cooling is an important part of the sourdough bread recipe because the crumb continues setting after baking. Cutting into the loaf immediately can release moisture too quickly and make the interior appear gummy. Allowing the bread to rest helps produce cleaner slices and a more consistent texture.
Place the baked loaf on a wire rack where air can circulate around the crust. Wait at least one to two hours before slicing, especially when preparing a larger loaf. The exact cooling time depends on the bread’s size and the surrounding temperature.
Once cooled, use a suitable bread knife to cut even slices. You should notice a firm crust surrounding a tender, slightly chewy interior. Enjoy the bread plain or pair it with your preferred toppings, keeping in mind that homemade sourdough often tastes especially good when freshly prepared.
How to Make Sourdough Bread With a Crispy Crust
A crispy sourdough crust develops through a combination of proper fermentation, oven heat, and moisture control. Steam during the early baking stages helps the bread expand before the surface becomes rigid. Once the steam is released, the crust can dry and develop deeper color.
Using a Dutch oven makes this process easier because the enclosed pot captures moisture from the dough. Removing the lid later allows the outside to become crisp and golden. Baking long enough for proper crust development is important, but excessive baking can dry the interior.
Cooling also affects crust texture because moisture continues moving through the bread after baking. Leave the loaf uncovered on a wire rack until it has cooled. Avoid placing freshly baked bread inside a sealed plastic bag because trapped moisture can soften the crust.
Common Sourdough Bread Mistakes to Avoid
One common mistake is using a sourdough starter before it becomes sufficiently active. A weak starter may cause slow fermentation and produce a dense loaf. Feed your starter regularly and observe its rising behavior before relying on it for bread making.
Another mistake is following fermentation times without considering temperature or dough appearance. A warm kitchen can accelerate fermentation, while cooler conditions may slow it dramatically. Learning to recognize dough expansion, bubbles, and elasticity helps prevent both underproofing and overproofing.
Cutting bread too early is another problem that can affect the finished texture. Even properly baked sourdough may feel sticky when sliced while hot. Allow the loaf to cool, use reliable measurements, and change only one part of your method at a time when troubleshooting.
Why Is My Sourdough Bread Dense or Gummy?
Dense sourdough bread often results from insufficient fermentation, weak gluten development, or an inactive starter. When the dough does not produce or retain enough gas, the loaf may have a tight crumb. This can happen even when the ingredients are measured correctly.
A gummy interior may also result from underbaking or slicing the bread before it cools. However, excessive fermentation can weaken the dough and produce a compact loaf as well. Examining the crust, crumb structure, dough behavior, and fermentation conditions helps identify the most likely explanation.
To improve future loaves, check starter activity and monitor dough expansion during bulk fermentation. Perform gentle folds to develop structure and bake the loaf thoroughly. Keeping notes about temperature, timing, and results makes it easier to identify patterns and improve your recipe.
How to Store Homemade Sourdough Bread
Fresh sourdough bread is often best enjoyed within the first few days after baking. Once fully cooled, store the loaf in a bread box or suitable breathable covering at room temperature. This helps reduce excessive moisture buildup while protecting the bread from drying too quickly.
Avoid refrigerating ordinary sourdough bread unless a specific filling or ingredient requires refrigeration. Cold storage can accelerate bread staling. If you do not expect to finish the loaf within a few days, freezing is generally a better option for maintaining quality.
For convenient storage, slice the bread before placing it into a freezer-safe bag or container. Remove as much excess air as practical and freeze the portions. Individual slices can be toasted directly from frozen, allowing you to enjoy homemade sourdough without preparing an entirely new loaf.
Easy Ways to Enjoy Homemade Sourdough Bread
Homemade sourdough bread is versatile enough for breakfast, lunch, or dinner. Its chewy texture and slightly tangy flavor pair well with both sweet and savory ingredients. Toasted sourdough is especially popular because the crust becomes crisp while the center remains pleasantly tender.
For breakfast, try sourdough toast with eggs, fresh fruit, or your favorite spread. You can also prepare sandwiches with vegetables, cheese, and other preferred fillings. The sturdy texture makes sourdough useful for grilled sandwiches and open-faced meals.
Leftover sourdough can be transformed into croutons, breadcrumbs, or simple bread-based dishes. Cutting the bread into cubes and baking until crisp creates an easy addition to salads and soups. These ideas help reduce food waste while making good use of every loaf.
Conclusion
Making a crusty sourdough loaf at home requires a few basic ingredients, an active starter, and patience. Understanding mixing, gluten development, fermentation, shaping, and baking helps turn simple dough into flavorful homemade bread. Following a consistent process is especially helpful when you are learning the technique.
The key to better sourdough bread is observing how your dough changes rather than relying entirely on fixed timings. Starter strength, room temperature, flour quality, and oven performance can all influence the results. Small adjustments and careful notes can help you improve your baking with each attempt.
Whether you are baking your first loaf or refining your skills, homemade sourdough offers an enjoyable way to explore traditional bread making. With practice, you can create bread with a golden crust, tender crumb, and rich fermented flavor. A simple, reliable recipe is the best foundation for becoming more confident in your kitchen.
Frequently Asked Questions About Sourdough Bread
How Long Does It Take to Make Sourdough Bread?
Sourdough bread commonly takes around 18–30 hours from mixing to baking when using overnight refrigeration. Most of this time involves fermentation and resting, while active preparation requires much less effort.
What Is the Secret to Making Good Sourdough Bread?
An active starter, accurate ingredient measurements, proper fermentation, and sufficient oven heat are essential. Learning to recognize when the dough is ready for shaping and baking can improve consistency significantly.
Why Is My Sourdough Bread Not Rising?
Poor rising can result from an inactive starter, low dough temperature, insufficient fermentation, or weak gluten development. Check your starter’s activity and allow the dough enough time to expand before shaping.
Can I Make Sourdough Bread Without a Dutch Oven?
Yes, sourdough can be baked on a suitable baking stone, steel, or tray with a safe steam-producing method. However, a Dutch oven makes moisture management easier, particularly for beginners seeking a crispy crust.
Is Sourdough Bread Healthier Than Regular Bread?
Sourdough fermentation changes some characteristics of bread and may improve certain aspects of digestibility or mineral availability. However, overall nutritional value depends on the ingredients, flour type, serving size, and individual dietary needs.